Bike Safety & Riding Skills Guide
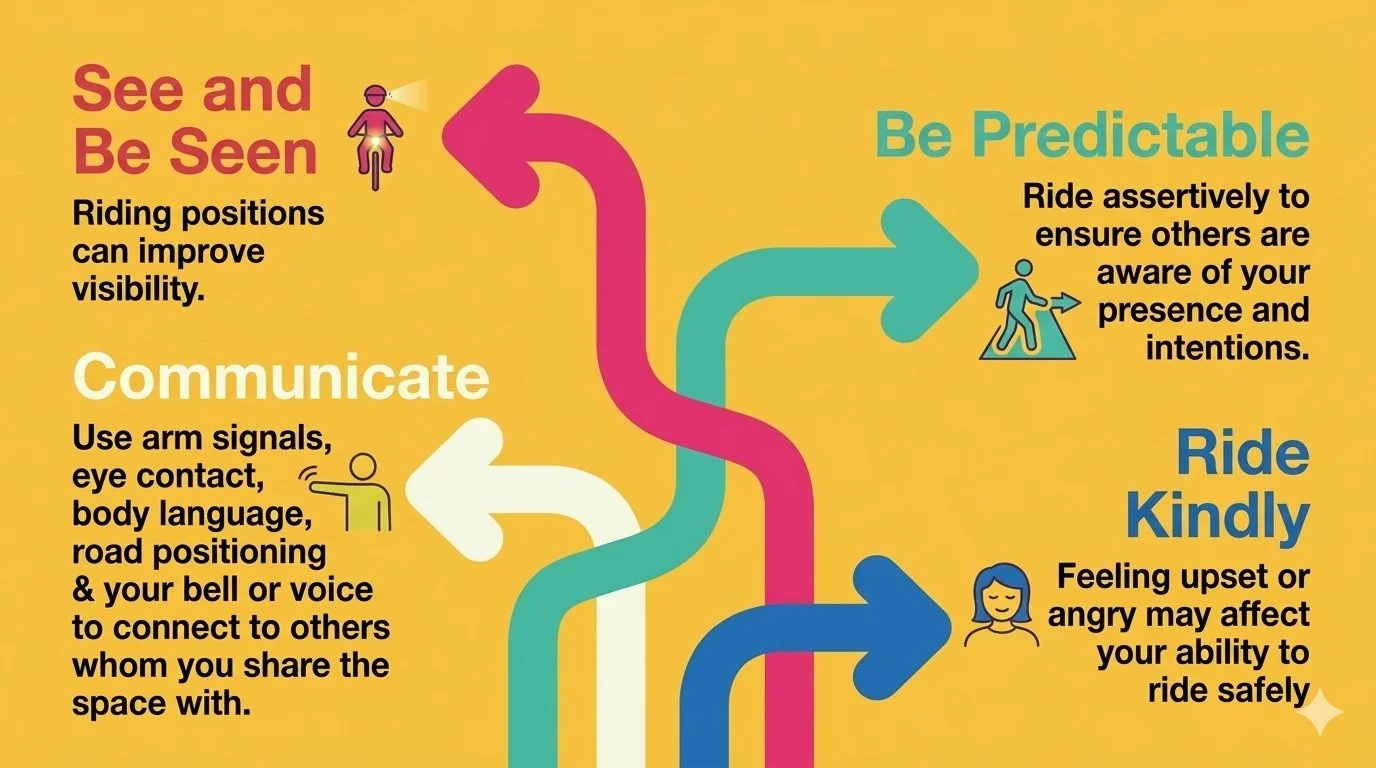
See & Be Seen | Be Predictable | Communicate | Ride Kindly | Graciously
Knowing how to pedal is only part of knowing how to get around by bike.
Starting comfortably, stopping with control, understanding what is happening around you and finding a route that suits you can all change how riding feels.
At Pedal Set Go, we teach practical bicycle skills for everyday journeys. This guide brings together the foundations we work on with new, returning and experienced riders across Sydney.
You don’t need to master everything at once. Start with the skills and situations that matter to you, practise in a suitable environment and build from there.
See & Be Seen | Be Predictable | Communicate | Ride Kindly
How we approach bike safety and riding skills
Our teaching connects Control, Observation, Communication and Positioning, together with understanding who needs to give way.
Control helps you manage the bike. Observation helps you understand your surroundings. Communication gives other people information about your intentions. Positioning helps you find space, see what is happening and give other people a better opportunity to see you.
When riding on the road, we bring these skills together through four useful questions:
Where do I need to look?
Where do I need to be?
Who do I need to communicate with?
Who needs to give way?
These aren’t separate tasks to memorise once. They are connected habits we practise in increasingly varied situations.
Looking behind is more useful when you can hold your line. Signalling is more useful when you have checked that a movement is safe. Choosing your position is easier when you have noticed the road narrowing before you reach it.
Skills support safety. They don’t excuse unsafe behaviour.
This guide is about giving you useful choices, not making you responsible for somebody else’s actions.
People driving must follow the road rules, give way when required and leave appropriate passing space. In NSW, the minimum passing distance is one metre where the speed limit is 60 km/h or less, and 1.5 metres where it is higher.
You do not have to earn consideration by riding perfectly or wearing particular clothing.
Read the NSW guidance on overtaking, including minimum passing distances.
Before you ride: check yourself and your bike
Choose a bike you can manage comfortably, with controls you can reach and operate. Your setup should support your current skills, mobility and confidence, rather than meet somebody else’s idea of how a rider should look.
Check your helmet fits correctly and is fastened. Secure loose clothing, shoelaces and bags so they cannot catch in moving parts.
Give yourself time to prepare. Notice whether you are tired, uncomfortable or distracted, and adjust your plans where needed.
The ABCD bike check
We teach a simple check before riding:
A — Air. Check tyre condition and pressure. Follow the tyre and wheel manufacturer’s guidance, taking account of the bike and load.
B — Brakes. Check each brake separately, then check that you can reach and operate the controls comfortably.
C — Chain. Check that the chain is seated correctly, moves freely and is appropriately lubricated. Belt-drive bikes need the equivalent checks for their system.
D — Drop. Where appropriate for the bike, a gentle lift and small controlled drop can help reveal unusual rattles or loose parts. This is not a substitute for checking that wheels, handlebars, the saddle and accessories are secure. Ask for assistance with a heavy bike.
A quick check helps identify problems; it does not replace servicing. Don’t ride a bike with an unresolved fault affecting its brakes, steering or structural security.
Our bike maintenance courses can help you understand your bike, recognise problems and learn useful everyday care.
Build control before adding complexity
A suitable traffic-free space gives you room to practise without also managing traffic. Work on individual skills, then combine them as they become more comfortable.
Starting and stopping
Hold the brakes while getting on or off, and choose somewhere with stable footing and enough space.
Before moving away, look around, choose a suitable gear and set a pedal in a useful starting position. In our lessons, that usually means set the pedal; a pedal raised to roughly the one-to-two-o’clock position, ready to help you start smoothly.
Pedal. Set. Go.
When stopping, use your brakes to slow the bike rather than trying to stop it with your feet. Keep your feet supported on the pedals while braking, then place a foot securely on the ground after the bike comes to a stop.
Bike design, saddle height and individual needs affect the technique. We help riders find a reliable way to start, stop and support their bike without rushing.
Braking with control
Get to know the brakes on the bike you are actually riding, particularly when borrowing, hiring or changing bikes.
On a bike with front and rear brakes, practise using both together with controlled, progressive pressure. Avoid grabbing the levers or relying only on the rear brake. How much pressure you use depends on the bike, surface, speed and load.
Cover your brakes as a regular riding habit.
This means keeping your fingers ready over the brake levers while maintaining a secure hold on the handlebars. Covering the brakes does not mean continuously squeezing them.
Having your fingers ready removes the extra movement needed to reach the levers before braking. When you need to respond quickly, that matters.
The number of fingers needed and the lever position should suit your hands and brakes. We help riders find a setup that allows effective braking without compromising their grip.
Sudden stopping: build the habit before you need it
An emergency is not the best time to learn how to stop.
That is why we practise controlled stopping as an everyday skill, then build towards stopping more quickly. The aim is to make the useful actions familiar before you need them urgently.
For everyday riding, we teach starting and stopping from a stable seated position where the bike setup and rider allow it. During braking, keep both feet on the pedals rather than putting them down early or stepping forwards off the saddle.
Use your brakes to stop the bike. Then put a foot on the ground to support yourself.
Keeping your feet supported on the pedals helps you maintain a stable position and brace through the stop.
When you need to stop more quickly, apply both brakes promptly with controlled pressure. Brace through your arms and legs to resist your body moving forwards, and move your hips back, staying low over the saddle or moving further behind it as needed.
The harder the stop, the more important appropriate body position becomes. Moving your weight back and controlling brake pressure help manage the forward weight transfer and reduce the risk of tipping over the handlebars. Avoid locking your elbows or snatching at the brakes.
Once stopped, keep the brakes engaged and place a foot down to support yourself.
The habits we practise during ordinary stops are the habits we are building for unexpected ones.
Keeping the brakes ready, maintaining a stable position and using the brakes rather than your feet to stop are not just beginner exercises. They are foundations for retaining control when something changes suddenly.
Practise gentle stops first in a clear, traffic-free space. Build towards firmer stops with an instructor, adapting the technique to your bike, mobility and conditions.
Using gears: comfort and control
Gears don’t need to feel complicated. They are there to help riding feel comfortable and manageable.
The aim is a steady pedalling rhythm with enough resistance to feel connected to the bike, without struggling to push the pedals or spinning your legs unnecessarily fast.
Choose a gear that suits what you’re doing.
A lower, easier gear reduces the effort needed to turn the pedals, helping with starting, climbing hills and riding slowly.
As your speed increases, a higher gear can provide more useful resistance so you can continue pedalling comfortably rather than spinning too quickly. Harder isn’t automatically better: choose what feels manageable for your speed and the conditions.
Gear choice supports other riding skills too.
At Pedal Set Go, we help riders find a comfortable gear when practising signalling, looking behind and holding a steady line. The aim is to make these movements feel easier and more controlled, without also fighting the pedals.
Think ahead.
Change into a suitable easier gear before a hill becomes difficult or before coming to a planned stop. That helps you prepare for the climb or your next start. Stopping safely always comes first, so don’t worry about changing gear during an emergency.
Check how your bike’s gears work.
With conventional derailleur gears, where the chain moves between different-sized cogs, keep pedalling forwards while changing. Briefly ease the pressure on the pedals rather than pushing hard through the change.
Many internal hub gears, housed inside the rear wheel’s hub, allow changes while stationary or coasting. You may need to ease off or briefly pause pedalling. Follow the guidance for your particular system.
Practise somewhere quiet until you can operate the controls without looking down.
You don’t need to memorise every gear combination. Start by noticing: does this feel too hard, too easy, or comfortable for what I’m doing?
Riding slowly: control and consideration
Being comfortable riding quickly doesn’t necessarily mean you feel steady riding slowly.
Slow riding brings balance, steering, gear choice and braking together. It helps you adjust your pace to the people and space around you, without needing to speed up to feel in control.
That matters when climbing a hill with somebody who needs more time, riding with children or moving through a busy shared space.
Riding together isn’t only about keeping up. It also means being able to slow down for each other.
Practise in a clear, traffic-free space. Look ahead, choose a manageable gear and work on coordinating your pedalling, steering and brakes.
The aim isn’t to ride as slowly as possible everywhere. It’s to have the control to choose an appropriate pace, including recognising when to stop, wait or get off and walk.
Slow-riding skills make Ride Kindly practical: giving other people time and space without putting pressure on them to hurry.
Observation: look early, look around, look again
Observation is more than checking directly in front of your wheel.
Look far enough ahead to notice changing surfaces, intersections, driveways, parked vehicles and people who may enter your path. Keep checking nearer details too.
Before changing position, moving away, turning or passing something, check the space you intend to use and what is approaching from behind.
A useful routine is to look, assess, communicate where needed, then check again before moving. Situations can change between your first observation and your action.
Mirrors can help you gather information. They still have limitations, so learn what yours shows and where you need additional checks.
We practise looking behind while holding a steady line. Where movement is restricted, we work with the rider on suitable equipment and observation strategies.
See the NSW guidance on hazard awareness.
Communication: help other people understand you
Clear communication is useful to people walking, driving and riding around you.
Hand signals communicate an intended movement. Your position, speed and body language provide information too.
Give people time to understand your intentions rather than signalling at the same moment you move. A signal is information, not permission to move into an occupied space.
NSW requires a right-hand signal for a right turn, except when making a hook turn. We also teach useful left-turn signals and other communication, while maintaining control of the bike.
Read the NSW guidance on hand signals and bicycle road rules.
Let people see that you are observing
Sometimes a deliberate head turn or change in the direction of your face can be an acknowledgement:
I know you’re there.
This is what we sometimes mean when we talk about “eye contact”. It does not have to involve literally looking into somebody’s eyes. You might already have seen a vehicle in your mirror, then use a comfortable head movement to make your awareness visible.
We teach this as part of body communication, not as a guarantee of another person’s response.
A glance, wave or apparent eye contact does not prove somebody has understood you or will give way. Keep observing what they actually do.
Positioning: choose space to see and be seen
Riding as close to the kerb as possible is not always the most useful position.
The road edge may contain drains, debris or broken surfaces. Parked vehicles can obstruct sight lines, and riding too close to them can put you within reach of an opening door.
Choose your position deliberately, taking account of the road layout, traffic, surface and what you need to do next.
Primary position
Primary position means riding centrally in the traffic lane you are using.
It can be appropriate where the lane is too narrow for somebody to overtake within it with sufficient clearance, when approaching or travelling through an intersection, or when preparing to pass an obstruction.
The purpose is visibility, space and predictable movement, not confrontation.
Check before moving into position. Holding a clear position does not guarantee that another road user will respond safely.
Secondary position
Secondary position is further left within the lane, while remaining clear of hazards.
It may be appropriate where there is genuinely enough space for another vehicle to pass safely. It does not mean riding in the gutter or squeezing alongside parked cars.
You can be considerate without giving up the space you need.
Stay outside the door zone
The door zone is the space an opening vehicle door can occupy.
Allow enough clearance for a door to open, with additional room where conditions require it. Door widths vary, so don’t treat a fixed distance as a guarantee.
Look ahead and plan your movement early. Avoid weaving into short gaps between parked cars and then emerging again.
If you cannot pass with suitable clearance, slow down, wait somewhere visible or choose another option rather than squeezing through.
Intersections: understand priority and keep your options open
At an intersection, ask what controls the movement: signs, signals, road markings, the layout and the applicable give-way rules.
Don’t assume that the larger road always has priority, or that arriving first automatically means going first.
Approach at a speed that allows you to assess the situation and stop if necessary. Keep checking for vehicles, people walking and other riders, including where a cycleway crosses a side street.
Having priority does not guarantee that somebody else has seen you or will give way.
The NSW intersection guide explains the different situations.
Turning right: there is more than one option
A direct right turn involves observing, signalling, choosing an appropriate position and giving way where required before completing the turn. It is a skill worth practising with support.
A hook turn can provide another option at an intersection where it is permitted. Rather than moving across to turn directly, you cross to the far side, wait clear of through traffic and pedestrian crossings, then complete the second part of the turn when permitted. At traffic lights, wait for the green signal governing that second movement.
Read the NSW explanation of bicycle hook turns.
You can also stop somewhere suitable, get off and use an appropriate pedestrian crossing, or choose a different route.
You do not have to make the most demanding manoeuvre to demonstrate confidence.
Roundabouts and larger intersections
Approach with a plan for your position, destination and give-way responsibilities. Don’t allow another vehicle’s presence to rush your decision.
Multi-lane roundabouts and complex intersections introduce additional decisions and rules. Choosing another route or walking through a suitable crossing is a reasonable option while building your skills.
Take particular care around trucks and buses
Large vehicles have significant blind spots and need extra space to turn.
Avoid moving into the gap between a large vehicle and the kerb, particularly near an intersection. A vehicle may move away from the kerb before turning back across that space.
Wait behind a turning vehicle rather than trying to squeeze alongside it. Avoid waiting immediately in front of a large vehicle where the driver may not see you.
Seeing a mirror or the driver is not proof that they have seen you.
NSW’s turning guidance includes advice about long and oversize vehicles.
Sharing paths: give people space and time
On shared paths in NSW, people riding must give way to people walking and keep left unless impracticable.
Giving way can mean slowing substantially or stopping. It is not simply ringing a bell and continuing at the same speed.
Let people know you are approaching early enough to avoid startling them. A bell or friendly voice can help, but somebody may not hear you, understand your intention or be able to move.
Leave generous passing space. Wait where the path is narrow or sight lines are limited. Allow for children, dogs, mobility devices and changes in direction.
A useful question is:
Would somebody else feel comfortable with the speed and space I’m choosing?
See the NSW guidance on bicycle lanes and shared paths.
Riding with other people
How you ride together depends on the purpose of the ride, the environment and the people taking part.
For a family journey, social outing or supported guided ride, choose a route and pace that suit the people riding, rather than expecting everybody to keep up with the fastest person.
Agree who is leading, how you will communicate and what to do if the group becomes separated. When riding with children or people who need support, make sure they know who is looking out for them.
Stay connected, with room to stop.
Riding together makes it easier to share directions, communicate and offer reassurance. Thoughtful positioning can help with visibility too. For example, riding alongside a child where conditions allow can make the pair more noticeable while keeping support close by.
But being in a group does not guarantee that every rider has been seen.
Leave enough space to react and stop if the person ahead slows unexpectedly. Keep your view of the road ahead, avoid overlapping wheels and communicate changes in speed or direction.
Notice when the group starts stretching out.
On a hill, somebody’s comfortable pace may be much slower than another person’s. Slow-riding skills help stronger riders adjust their pace without losing control or riding away from the people they are accompanying.
When large, unplanned gaps develop, it becomes harder to communicate and keep track of each other. Traffic may move between separated riders, including vehicles turning into a side street or driveway.
The concern is not simply that the group has been split. It is that somebody behind may feel pressured to sprint, hurry through an intersection or make a decision they would not otherwise make.
Instead, pass a message forward. Riders ahead can ease their pace where safe or stop somewhere suitable to regroup.
Help the group stay connected by adjusting the pace ahead, not by expecting the people behind to chase.
Keep making your own decisions.
Following another rider does not mean it is safe or permitted for you to follow them through an intersection. Check for yourself and obey the signals and give-way rules that apply to you.
Don’t close gaps dangerously to prevent other road users moving between riders. Group size, spacing and formation need to suit the conditions; some rides are better managed as smaller supported groups.
If you become separated, use the agreed regrouping plan. Staying together is never a reason to rush a crossing, continue against a signal or compromise somebody else’s space.
The aim is to keep people supported and decisions unhurried.
Choose a speed that gives you options
An appropriate speed depends on what is happening around you, not only on how confident you feel handling the bike.
Leave enough time and space to respond to a person stepping out, a narrowing path, a turning vehicle or an unexpected surface change.
If you cannot see far enough ahead to stop within the available clear space, slow down.
This matters on any bike. On an e-bike, a motor-assistance limit is not a recommended speed for a busy path.
High-visibility behaviour: more than clothing
We teach high-visibility behaviour: choosing a visible position, observing, communicating and moving predictably.
Lights, reflectors and clothing work alongside these skills. They do not replace them.
Think about the background, weather, light conditions and sight lines. Fluorescent materials can help in daylight; retroreflective details return light from headlights after dark. Reflective details on moving legs can also help reveal the movement of a person riding.
In NSW, riding at night or in hazardous weather requires a white front light and red rear light, each visible from at least 200 metres, plus a red rear reflector visible from at least 50 metres in another vehicle’s low-beam headlights.
Check that lights are working and unobstructed. Aim them to help people see without dazzling other road or path users.
Read the NSW bicycle equipment requirements.
For the fuller explanation, read How to Be More Visible on a Bike: It’s More Than Hi-Vis.
Adapt to weather, surfaces and your own energy
Wet conditions can affect grip, braking and visibility. Allow more space, brake earlier and make steering and speed changes smoothly.
Take particular care with wet paint, metal covers, leaves and rail tracks. Avoid riding through water when you cannot see the surface underneath.
Where tracks cross your route, choose a safe approach that crosses them as close to a right angle as practicable. Check around you before changing direction. Walk the bike where that is the more manageable option.
Strong wind, heat and fatigue can also change what is sensible for a journey. Take a break, change the route or stop riding when conditions are beyond what you can comfortably manage.
Read the NSW advice on riding conditions and fatigue.
Get familiar with e-bikes, cargo bikes and carrying loads
A different bike deserves a little practice, even when you already ride regularly.
Before joining traffic, get familiar with its weight, controls, assistance settings, braking and turning space. Start with a manageable level of assistance.
Secure bags and other loads using suitable equipment. Keep straps clear of wheels and avoid hanging shopping from the handlebars.
Check the manufacturer’s limits and instructions for carrying children or other passengers. Practise controlling the bike before adding a passenger or substantial load.
The fundamentals remain the same: control, observation, communication, positioning and understanding priority.
Route choice is a riding skill
The route you know from driving or catching a bus may not be the route that works best by bike.
Consider traffic speeds, hills, crossings, path surfaces, lighting and where different parts of the network connect. A slightly longer route may be more comfortable and enjoyable.
We encourage riders to use several sources: council cycling maps, route-planning tools, local knowledge and what they observe on the ground.
The Transport for NSW Cycleway Finder is one useful starting point.
Check how a suggested route works in practice. A line on a map does not tell you everything about a crossing, hill or road surface.
Walking a section, choosing another connection or combining riding with public transport can all be good decisions. Check current bicycle carriage conditions for the service you plan to use.
Becoming a confident rider does not mean you have to ride everywhere.
Ride Kindly: look after the journey, not just the destination
Kindness is part of how we share streets and paths.
Giving somebody room. Slowing before passing. Acknowledging another person. Allowing time for a manoeuvre. Parking where access remains clear.
These are small, practical choices that can make a journey feel more welcoming.
Ride Kindly also means looking after yourself.
Feeling pressured, frightened or frustrated is understandable. You don’t have to pretend otherwise, and you don’t have to continue riding while shaken.
Find somewhere suitable to stop, take a breath and decide what would help. That might mean allowing traffic to pass, taking a break, choosing another route or ending the ride.
Our aim is to help people feel more comfortable, keep their attention available for what is happening around them and make their next decision without unnecessary pressure.
Kindness does not mean excusing unsafe behaviour, giving up the space you need or engaging with somebody who is hostile. You can be considerate and maintain clear boundaries.
And it is not only for people travelling the same way as us. Many of us walk, ride, drive and use public transport at different times.
We can respond to a particular behaviour without blaming everybody who travels that way.
We want riding to feel good, not simply to get us from A to B. Kindness is part of that, for ourselves and for the people around us.
Know the NSW rules that apply to your journey
This guide explains practical skills, but it is not a substitute for the current road rules or individual instruction.
Some useful distinctions are:
Helmets and equipment. Riders must wear an approved, correctly fitted and fastened helmet unless a lawful exemption applies. A bicycle needs an effective brake and a working bell, horn or similar warning device.
Bicycle lanes and paths. An on-road bicycle lane must generally be used when it runs in your direction, unless impracticable. Using a separate bicycle path is generally optional. Check the signs and layout rather than assuming every cycling facility has the same rules.
Footpaths. Footpaths are different from shared paths. Children under 16 can generally ride on footpaths unless prohibited. There are specified exceptions for older riders, including supervising children, carrying a child under 10 as a passenger and medical-certificate provisions.
Pedestrian crossings. Generally, get off and walk across pedestrian crossings unless bicycle crossing lights permit riding. Follow the applicable signals.
Traffic controls. Obey traffic lights, signs and give-way requirements. A painted bicycle symbol or coloured surface does not, by itself, tell you who has priority.
For current information, use the NSW bicycle safety and road rules hub, including its guidance on riding near pedestrians and footpath exceptions.
Put the skills into practice with Pedal Set Go
Reading can help you understand a skill. Practising it with useful feedback helps you discover how it works for you.
Our lessons are progressive, but they are not a race through a checklist. We demonstrate, practise, ask questions and build on what you can already do, adapting to your goals and needs.
Learn to Ride supports people who are not yet riding independently.
Back On Your Bike helps riders refresh control skills and rebuild confidence.
Confident City Rider brings observation, communication, positioning, route choice and decision-making into real riding environments.
You don’t need to be new to riding to have something useful to learn.
Explore Pedal Set Go bike lessons in Sydney.
See & Be Seen | Be Predictable | Communicate | Ride Kindly
How to Use Your Brakes Effectively
Biking, whether for transport, the daily commute, or recreational purposes, offers numerous benefits and joys. However, learning the art of braking is crucial to ensuring safety on the road. Your habits in handling the bike, especially how you use your brakes, play a pivotal role in how you react during an emergency. There's no need to overthink it, but understanding the function of both front and rear brakes and their proper use can significantly reduce the risk of accidents.
The Dynamics of Front and Rear Brakes
Bikes are equipped with two brakes: one at the front wheel and another at the back. These brakes work differently and, therefore, need to be used together for controlled and effective stopping.
Front Brake: It's more powerful than the rear brake because braking shifts the rider's weight forward, increasing the front tire's grip on the road. However, improper use can lead to the dreaded scenario of going over the handlebars. To avoid this, get in the habit of keeping your bum in the seat when braking, which keeps your weight back.
Rear Brake: Using only the rear brake might seem safer, but it significantly reduces your ability to stop quickly. Relying solely on the rear brake in emergencies can lead to longer stopping distances and potentially more severe accidents.
Establishing Good Braking Habits
Use Both Brakes Evenly: To know how to stop a bike quickly and with control, apply both the front and rear brakes evenly. This method allows you to avoid overthinking while utilising the full stopping power of your bike, reducing the risk of accidents.
Keep Your Bum in the Seat: This advice might seem counterintuitive, especially if you've experienced a fall by going over the handlebars as a child. However, keeping your bum in the seat when stopping and starting ensures that your weight is distributed towards the back of the bike, minimising risk and ensuring good habits for the rare emergency situation.
Feet on the Pedals Until Stopped: The more you are attached to the bike, the more control you maintain. Removing a foot reduces control by 20%, removing both, 40%, and lifting your bum off the seat, 60%….you get the picture! Do NOT put two feet down when stopping the bike. And if your seat is high, resist the urge to get out of the saddle… seat… as you come to a stop.
Brakes On and One Foot on the Ground When Stationary: Developing the habit of keeping the brakes engaged and only one foot on the ground when stationary ensures maximum control. This position also prepares you to move off quickly and safely. Pedal, Set … Go!
Safe Mounting and Dismounting: Most single-person bike accidents occur when falling from a stationary position. Not much more hurt than your pride! To get on and off your bike safely, tilt the bike towards you with the brakes on. This approach turns the bike into a stable tripod, making it easier to mount or dismount without losing balance.
Understanding How Brakes Work
Wheels Stop, Bike Doesn't: When you engage the rear brake alone, the wheel locks and it slows the bike, but the momentum can carry you forward, especially if stopping suddenly. Using the front brake, in conjunction with the rear, distributes the stopping force more evenly, allowing for a quicker and safer stop.
Incorporating these habits into your daily riding routine will not only improve your control over the bike but also enhance your overall safety on the road. Remember, what you do as a habit is what you'll revert to in an emergency. By practicing safe braking techniques, you ensure that you can navigate through traffic and enjoy your ride with confidence. If you want to know more, join us for an individual or group course to feel confident city riding on the streets of Sydney……or dream big…. and cycle across the world.
How to make a right turn on a bicycle?
Making a right turn can be considered tricky when riding a bike as you may need to stop in the middle of the road to give way to any oncoming traffic. It is normal to feel pressure as a vulnerable road user but the good news are there are many options to relieve that pressure and get from A to B. So let’s explore options of how to turn right on a bike.
Option 1 - When there is no oncoming traffic make a classic right turn. From the primary position (centre of the lane) look over your right shoulder to check for any vehicles behind you, communicate to other road users by signaling a right turn approximately 30 meters before the intersection. Take another look over your right shoulder to check it is safe to turn and if so, proceed into the side street, remembering not to cut the corners.
Under NSW legislation, the road rules are that you must signal for a right turn. Pedal Set Go can help you iron out any wobbles so get in touch if you would like to do a course.
If there is oncoming traffic you may slow down or speed up to ensure you turn either before or after approaching vehicle to avoid having to stop and put your foot down in the middle of the road. This is not always practicable so let’s look at other options.
Option 2 - Walk! One of the best things about riding a bike is that it is so easy to get off and walk. As a pedestrian you often have priority over other road users . For example you may be able to pull over to the left and walk across a zebra crossing where other vehicles in both directions are required to give way to you. If there is no zebra crossing there may lights to use for your advantage. Remember it is illegal to ride on a green man signal.
Option 3 - U-Turn! Make a left hand turn and when safe to do so make a U-Turn. Give way at the intersection and proceed across the major road when you can. This can significantly relieve the pressure of making a right turn directly from the major road into a minor road.
Option 4 - Perform a Hook turn. Hook Turns are not just for drivers in Melbourne. Bike riders are permitted to make a hook turn anywhere unless prohibited by a no hook turn sign. You are not required to signal and signalling may be confusing to other road users.
So how to perform a hook turn by bike?
A Hook Turn is a right turn from the left lane. As you approach the intersection, merge to the far left and position your bicycle away from moving traffic, facing the direction you wish to go. Keep clear of any pedestrian crossing. Sometimes there are painted storage areas for bikes to do a hook turn and you must position your bike in this area if the infrastructure is available. At crossroads with traffic lights you must wait for green before proceeding straight ahead. Where there are no lights proceed when no vehicles will cross your path from either direction.
Option 5 - Choose a different route and explore Sydney ‘s cycleways.- Remember there is almost always an alternative way to get about by bike. City’s are full of connecting green ways, quiet streets and lanes, often parallel to busy roads. Free bicycle friendly maps are available from most local council’s so jump on their web sites and download a pdf copy or order one to be delivered directly to your door.
Take extra careful near trucks and buses. Never overtake on the left of a vehicle even if it is stationary and ensure the driver can see you. Know their blind spots and if you can not see the driver remember that they can not see you.
Ride clear of parked cars. Being 'doored' is one of the highest reasons for hospitalisation of cyclists in Sydney. Unless riding at 5 kilometres an hour or less, (Walking pace) Pedal set Go recommends you ride at least one metre away from parked cars so you can avoid car doors that may open in front of you.
Be aware of fast-moving traffic. Motorbikes and scooters often go much faster than other road users. Some vehicles are also very quiet. Vehicles can come up behind you very quickly, so regularly check behind you and always check before changing positioning within lanes.
Take special care at intersections. Most crashes happen at junctions so ensure you can see and be seen especially when there are multiple lanes and vehicles are moving fast. Our Confident City Rider Course gives you great tips to reduce the risks and improve safety cycling in the city.
You don’t have to use poorly designed cycleways. "Cycleways" or bicycle paths can improve safety, yet some in Greater Sydney are outdated and of poor quality: they are too short, give way to side streets, are too narrow, put you in the door zone, block sight lines or are blocked by parked cars or debris. The law permits bike riders to ride on the road instead of a bicycle path. However you must ride in a Bike Lane which is easily recognised by the sign with a picture of a bike and the word “LANE’. There are not that many of these in Sydney. Don't assume either paths or lanes are an automatic route to reducing risk. Choosing quiet streets can sometimes be a better alternative.
Be an assertive rider. You have the same right to ride on the road as other vehicles. It is safer to ride at least a metre from the kerb or parked cars so you can avoid opening car doors. Riding in the primary position and taking the lane also ensures you are more visible to other road users, such as those entering from side streets or those approaching from behind.
Make eye contact. Friendly interactions and eye contact with other road users not only keeps you safe but also ensures your journey is enjoyable. Include those who may turn across your path from side roads, those driving behind you, and those while you are waiting at traffic lights. Don't be afraid to smile, and make the effort to thank people when they are courteous. Riding a bike gives you an advantage over people in other vehicles in that it is easy to make eye contact and thus enable other road users to treat you as a human rather than an obstacle that they have to get around.
Communicate with hand signals .It's safer, and good manners, to signal left or right when turning in the vicinity of other road users, including other bike riders and people walking. But remember, control of the bike takes priority. If you do not feel that you have control by taking a hand off the handlebar to signal right, you are better off pulling over to the left and dismounting. If you are lucky, there will be a pedestrian crossing, which may be the fastest route available for you to cross the road.
Be considerate to people walking in Sydney. Slow down and give pedestrians enough space on shared paths, where they always have priority. When riding along busy streets, go at a speed that allows you to avoid anyone who steps off the footpath into your path of travel. Remember to ring your bell to notify people of your approach, and a friendly vocal greeting is always welcome.
Use front and back lights at night It is a legal requirement to use bike lights from dusk till dawn; also consider wearing light-coloured or high-visibility clothing or adding reflective material to your bike and gear.
Adjust your behaviour in bad weather Reduce your speed and allow extra margins for error to manoeuvre or stop your bike. Give other road users additional space as they will also need more braking time. Road users and pedestrians may have reduced visibility and you may also consider wearing high visibility clothing and using your lights even in the day time. Oil leaking from motorised vehicles, paint, wet leaves and metal surfaces will be slippery.
Don't run red lights or ride on the footpath. These actions can be hazardous and/or frightening to others, especially people walking. Riding on footpaths is against the law with a few exceptions, such as accompanying a child up to 16 years of age. These actions are a common source of conflict with other road users, and unfairly present all riders as “cyclists” who break the law.
Take care when carrying a load. Panniers, a rack, basket or a rucksack are good options for general items. Hanging your shopping from handlebars or carrying bags under one arm makes riding more difficult and may cause items to come in contact with moving parts.
Take care of your bike. Know your ABC safety check. Check for enough Air and the appropriate tyre pressure, ensure both your Brakes work, and ensure that your Chain is clean and oiled regularly. At Pedal Set Go our course offerings include beginner bike handling lessons, commuter skills, advanced road techniques, and to keep you rolling …. bike maintenance workshops. We also teach people preventative maintenance to reduce costs and common maintenance issues with owning a bike.
Ride Graciously. If another road user's actions cause you alarm, it is better to let them pass when it is safe to do so. Take a quick break if you need to. If you shout at them angrily, it is unlikely they will listen. However, you will likely get upset or angry, which makes it difficult to make good decisions and ride safely as your head is no longer focused on the task at hand, which is enjoying riding from A to B.
Know the Road Rules and regulations applicable to all road users.